 |
Home | |
ARCHIVE |
 |
Home | |
ARCHIVE |
NETTING: | ||||||||||||||

| ||||||||||||||
|
The making of netting is an ancient craft. Many prehistoric cultures used netting for a verity of uses, storage bags, fencing, hammock, just to name some and of course the obvious use as a fish net. No matter what the netting was used for, the knitting of the mesh was done by tying a series of loops in some type of twine.
In one method, the basic knot used was the sheet bend. To form and tie the loops a knitting shuttle and a spacer (gauge) were used. | ||||||||||||||
|
NETTING TOOLS:
The size of the shuttle and gauge that is needed will depend on the project that you are working on. The size of the shuttle and gauge given in the following directions is a convenient size for many projects and is also a good size to use for practicing the craft of netting. Shuttles and gauges of different sizes can be made by changing the size of the materials used.
Knitting Shuttle: | ||||||||||||||

| ||||||||||||||
|
cross sections | ||||||||||||||

| ||||||||||||||
|
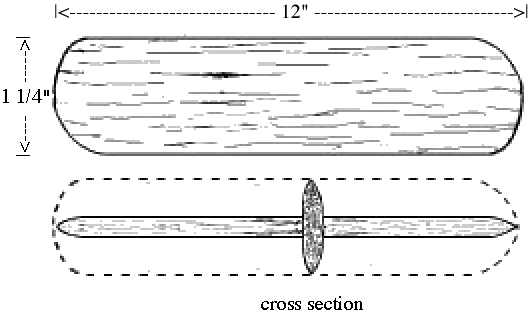
Make the knitting shuttle from a 1/4 inch * 1 inch * 12 inch piece of smooth grained hard wood. Carve and sand the shuttle to the shape shown in the diagram. Leave the shuttle unfinished; varnish or paint has a tendency to become sticky. | ||||||||||||||
|
Knitting Gauge:
Make the knitting gauge from a 1/4 inch * 1 1/4 inch * 12 inch piece of smooth grained hard wood. Carve and sand the gauge to the shape shown in the diagram. Leave the gauge unfinished; varnish or paint has a tendency to become sticky. | |||||||||||
| |||||||||||
|
Filling The Knitting Shuttle: | |||||||||||
|
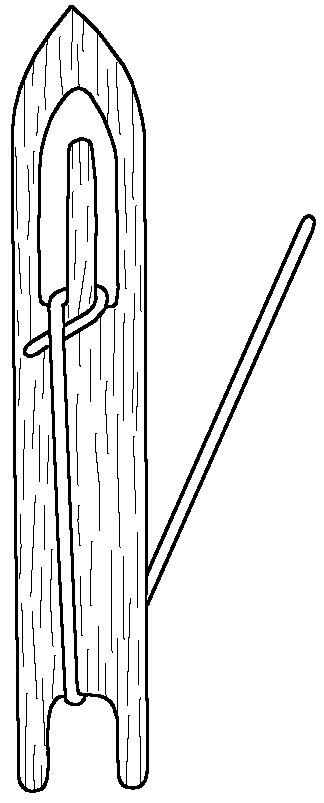
STEP 1: Fill the shuttle with twine. Start by tying a single hitch around the tongue of the shuttle and then pass the twine through the notch. | ||||||||||
| |||||||||||
|
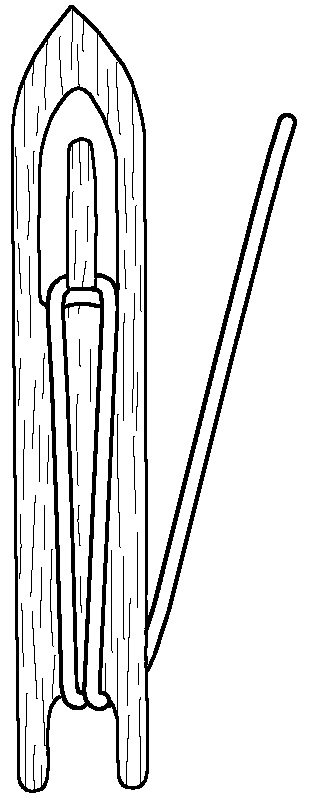
STEP 2: Turn the shuttle over, loop the twine around the tongue and then through the notch. | |||||||||||
|
STEP 3: Continue turning the shuttle from side and looping the twine around the tongue until the shuttle is filled.
[NOTE] To prevent synthetic twine from fraying, use a candle flame to cut and fuse the ends.
[WARNING] Using a butane cigarette lighter to cut or fuse synthetic rope or twine may cause the lighter to over heat and explode.
DIAMOND MESH NETTING:
Diamond mesh netting is the easiest of the two forms of mesh to make. Square mesh netting will be dealt with latter.
Casting On: To start diamond mesh netting the first row of mesh loops is cast on to a loop of some kind. The kind of loop used depends on the project; a ring, grommet, frame, or loop of twine may be used. The following directions are for casting on to a ring but the same steps may be used for any starting loop. | |||||||
|
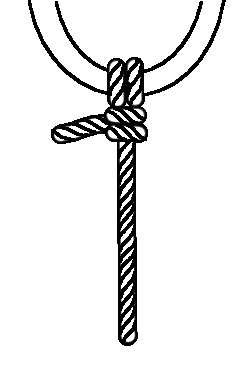
STEP 1: Tie the end of the twine to the ring with a clove hitch stopped with two half hitches. | |||||||
| |||||||
|
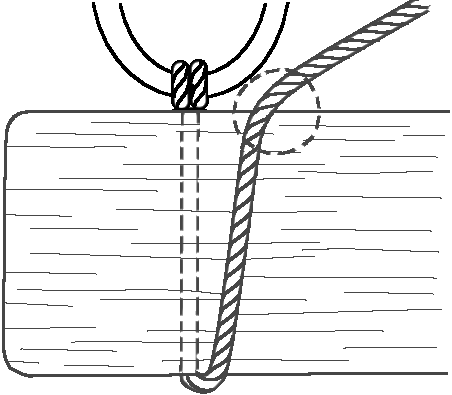
STEP 2: Place the twine behind the gauge then bring the twine in front of the gauge and to the right. | |||||||
| |||||||
|
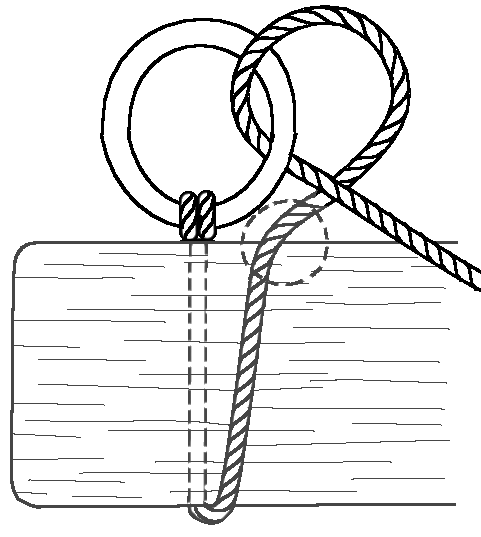
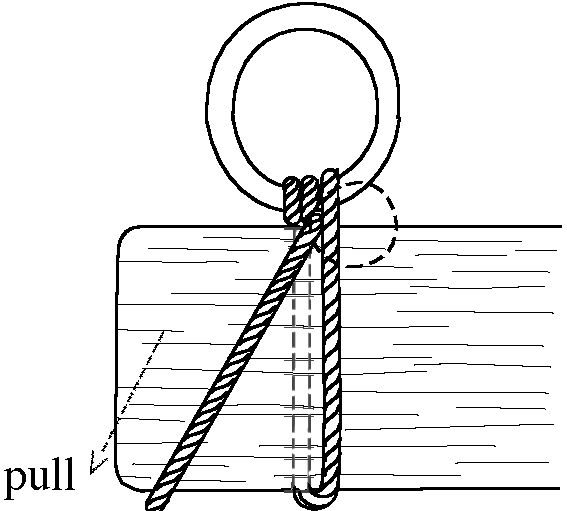
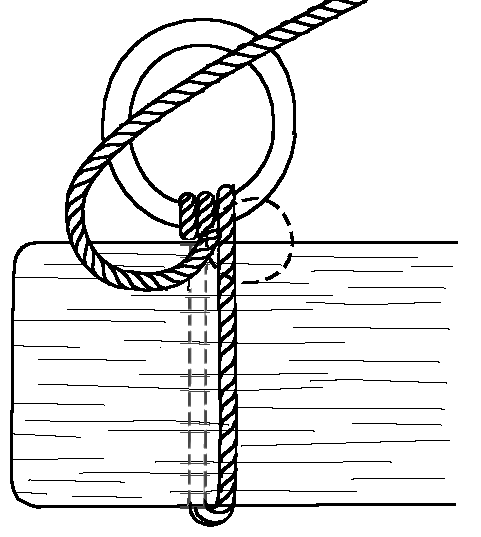
[NOTE]: The dotted circles in each of the diagrams is used to show the position of the thumb and finger of the left hand. | |||||||
|
STEP 3: Reeve the twine through the ring from the front to the back so that an overhand loop is formed. | ||||||||
| ||||||||
|
STEP 4: Pull the twine to the left to tighten the twine around the ring and the gauge. | ||||||||
| ||||||||
|
STEP 5: Lay the twine across the ring from left to right. | ||||||||
| ||||||||
|
STEP 6: Reeve the twine through the ring from the back to the front. | ||||||
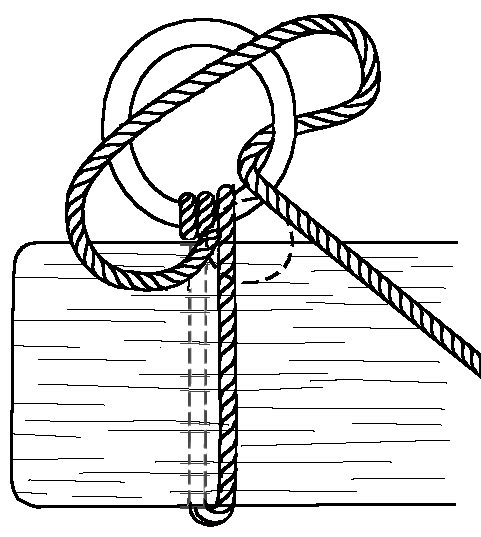
| ||||||
|
STEP 7: Place the twine behind the gauge; then pull the twine downward to tighten the twine around the ring. This forms a lark's head knot around the ring. | ||||||
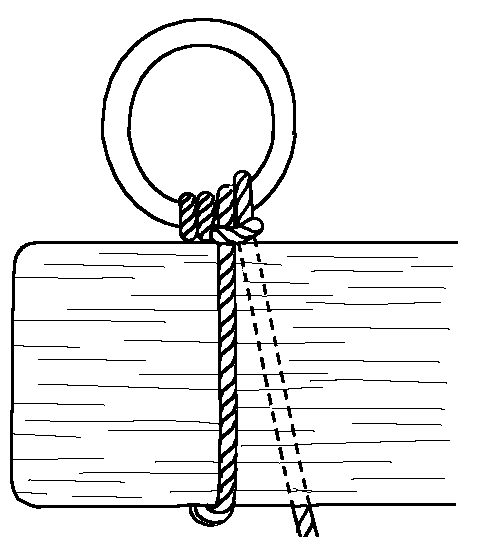
| ||||||
KNITTING A ROW OF MESH: | |||||||
|
Netting is made by knitting roes of mesh using a shuttle and a gauge. The gauge is used to determine the size of the mesh, and the shuttle is used to hold the twine and form and tie the mesh loops. The basic knot used in netting is the sheet bend. The following diagrams illustrate the tying of the sheet bend as it is used for knitting a net. | |||||||
|
STEP 1: Bring the twine down and up the back of the gauge. Then pick up the next loop by passing the shuttle through the loop from front to back. | |||||||
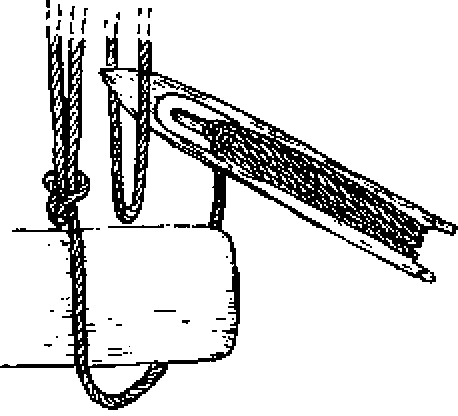
| |||||||
|
STEP 2: Pull the twine to the left to tighten the twine around the gauge. Use the thumb and finger of the left hand to hold the twine in place. | |||||||
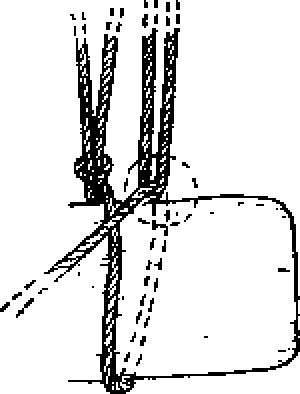
| |||||||
|
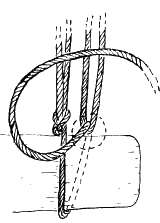
STEP 3: Lay a loop of twine over the loop just picked up. | |||||||
| |||||||
|
STEP 4: Pass the shuttle in back of the picked up loop and the through the loop that was laid on top. | ||||||||||

| ||||||||||
|
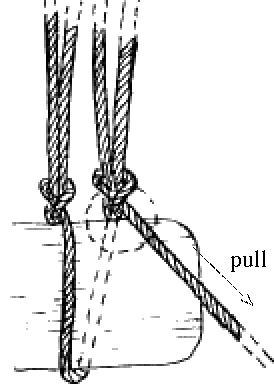
STEP 5: Pull the twine downward and slightly to the right to tighten the knot. | ||||||||||
| ||||||||||
|
STEP 6: Repeat steps 1 through 5 for each loop in the row. | ||||||||||
STARTING A NEW ROW: | ||||||||||
|
STEP 1: When the end of a row of mesh is reached, slide the accumulated loops off the gauge, turn the work piece over so that the running end of the twine is on the left side of the work piece. | ||||||||||

| ||||||||||
|
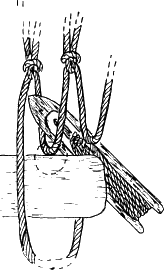
STEP 2: Wrap the twine around the gauge from front to back; pick up the first loop by passing the shuttle through the loop from back to front. | ||||||||||
| ||||||||||
|
STEP 3: Knit the loop in place by following the directions for knitting a row of mesh. | ||||||||||
|
ADDING A LOOP: | ||||||||||
|
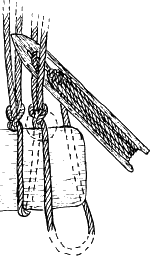
For some projects it is necessary to increase the width of the netting part way through the project. The width of the netting is increased by adding loops of mesh. | ||||||||||
| ||||||||||
|
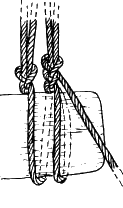
A loop is added by picking up the same loop a second time so that two loops are formed in the new row of mesh are tied to the same loop in the previous row of mesh. | ||||||||||
| ||||||||||